Record a Video Conference
Use the icon in the user menu bar to record a video conference. You must have a Rev cloud account and video conferencing must be enabled for this icon and functionality to be present. Contact VBrick Support Services to enable video conferencing.

To record a video conference:
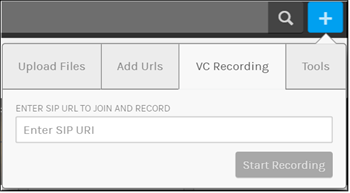
1. Click icon on the menu bar.
2. Click the tab.
3. Enter the and click the button to join and record the video conference of your chosen video source.
4. If a valid is used, Rev will connect to the conference room and begin recording.
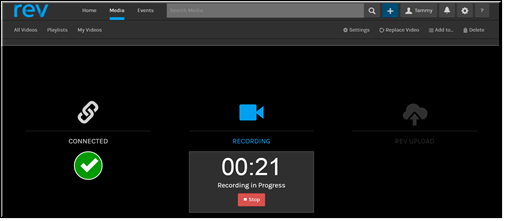
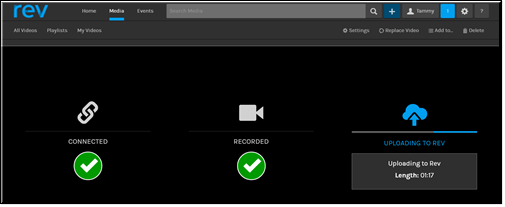
5. When the button is pushed, Rev will upload the video to Rev and disconnect.
6. Video uploads are automatically set to status by default
7. Once your video(s) have finished uploading and transcoding, you will receive an email with a link to the video. This means you do not have to keep manually checking your videos to see if they have finished processing.
| Note: By default, video conference recordings just as all other uploaded video as well as video URLs (live and VOD) and recorded Webcasts, are set to inactive status and must be manually activated. This allows you to control when videos are available for general viewing so that video settings such as thumbnails, categories, access controls, and so forth may be put in place before allowing your audience to view them. |
| Role(s): Account Admin, Media Admin, or Media Contributor |
See Also: