Add Chapters to a Video
Use the dropdown to add chapters to a video. Adding chapters to a video allows other Rev users to jump to specific locations on the video’s timeline that you have defined. This is beneficial in that if you have a long video, you can create named chapters to allow immediate access to content users may be looking for rather than forcing them to view or search the entire video with no directional assistance.
| Caution: Once you save any edited video, the original is lost. You are always advised to download a copy of the original first! |
You must have edit access to use this functionality. The icon will then be present on the Video Player.

To add chapters to a video:
1. Select the video you want to edit and click the icon on the .
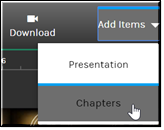
2. Click the dropdown on the buttons that appear and then select .
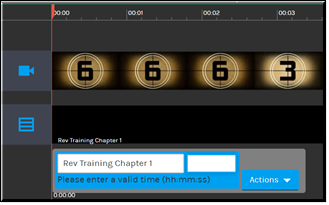
3. The first chapter appears at 0:00:00 on the timeline. Enter a name for the chapter and new time (if you want to change its location) to create the first chapter.
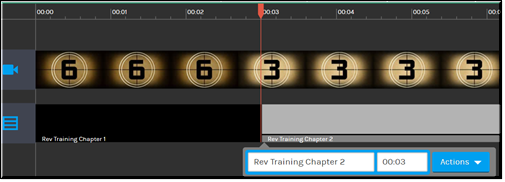
4. To add a second chapter, click the location on the timeline where you want the chapter to appear and then click > again. The fields will appear so that you can once again name your chapter and fine tune where it will appear on the timeline if desired. You may also use the dropdown to add an image to the chapter, remove a slide image (if previously added), or delete the chapter entirely.
5. To continue adding chapters to the video, click the location on the timeline where you want the chapter to appear, then click > to enter the chapter name and adjust its attributes if desired.
| Note: If you leave a timeline gap between chapters, Rev will automatically stretch the preceding chapter’s time to meet your most recently entered chapter’s time so there is no space between chapters. |
6. Once you have finished adding chapters, click the button. You may click the or button(s) at any time before you click to revert any changes you have made to the video.
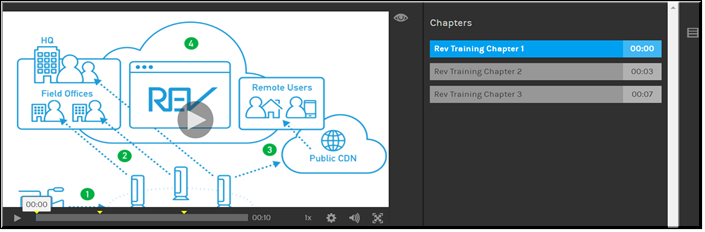
7. Users that view the edited video may now click on the icon to view and jump to the chapters that you defined.
8. When chapters are added to a video, a default image is also added as seen in the image above. To disable chapter images during playback, use the toggle to the right of the image.
| Role(s): ●Account Admin ●Media Admin ●edit access |
See Also: