Replace a Presentation Slide in a Recorded Webcast Event
Before you make your recorded Webcast event available to all users, you may replace one or more presentation slides so that mistakes may be corrected or information updated if needed.
| Tip: To replace a slide, you will need an image of your replacement slide. For best results, open your original PowerPoint deck and save the slide as an image from the File > Save As menu. All accepted Rev image file formats may be used (jpg, png, gif). For more help with saving your slide as an image, view the Microsoft Help topic located here. |
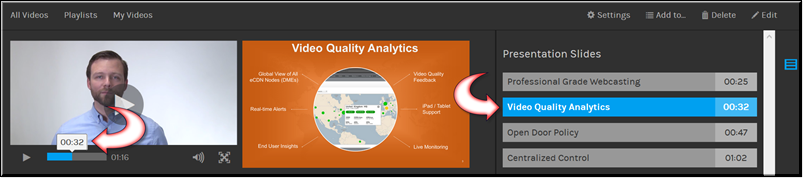
The icon on the right of the screen is used to view and jump to the slide chapters that are currently present in the video.
When the icon is clicked, the for the Webcast are displayed along with what time in the video they appear, seen below. All users may access this icon and jump to a specific slide in the video but only admins and users with edit access may edit slide chapters.

To add or delete an image or slide from a video chapter:
1. Select the video you want to edit and click the icon on the Video Player.
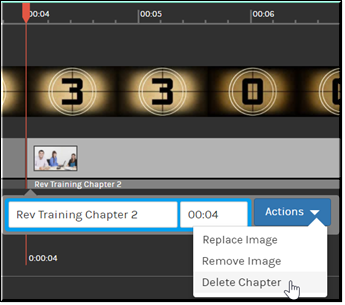
2. Click on the slide you want to edit.
3. Under the dropdown you may select , , and accordingly. If no image has been previously uploaded, you will have an option.
Keep in mind:
●Anyone with video edit access may modify slide titles.
●Edits may be previewed by clicking the button on the video and playing from the current location or playing from a point in time. No changes are final until the Save link is clicked.
●Clicking reverts all changes since the last save.
See Also: