Field | Required | Description |
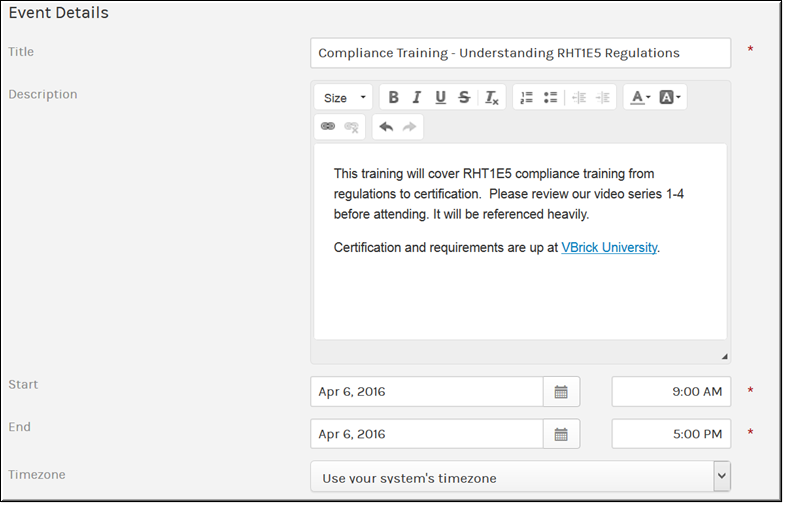
Title | Yes | Descriptive title for your Webcast. |
Description | Extended description for your Webcast that displays as part of the launch page before the event starts and as part of the Event Details section after the event starts. This also becomes part of your invitation text to your attendees so be aware of what you include in this field. You may use the Rich Text Editor controls to customize the Description field including font size, color, formatting, and the ability to open a hyperlink to a new page if desired. As noted, this text formatting will be displayed in the invitation text as well as on the event launch page and guest login (if enabled). | |
Start Date | Yes | The start date may not be after the end date/time. |
Start Time | Yes | This is defaulted to 9:00 a.m. (if not on monthly view). If navigated from weekly or daily view, the default is the time selected from calendar. This may not be after the end date/time. |
End Date | Yes | The default end date is the same as the start date. The end date may not be before the start date/time. |
End Time | Yes | This is defaulted to add one hour to the start time. This may not be before the start date/time. |
Time Zone | No time zone is selected by default because the time zone is assumed to be that of the user’s browser. The Event Admin can manually specify a time zone for the event if scheduling an event on behalf of someone in another time zone. If manually specified, all admins that can access the event details will see the event in the manually specified time zone. |
Tip: If the event start date/time are modified, the end date/time are also subsequently changed to keep the original duration that was specified for the event. For example, if an event is set up to begin at 1:00 and end at 3:00, the end time would change to 5:00 if the start time is changed to 3:00. |
Field | Required | Description |
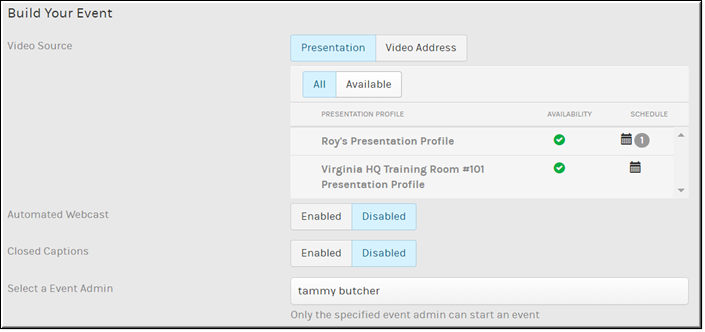
Video Source | Yes | Select your Video Source; Choose a video source of a Presentation Profile or Video Conference streaming. Presentation Profiles are comprised of more traditional video sources and will require admin set up while Video Conference streaming will require a SIP address and will need to be enabled first. If you are not sure which set up to use, ask your admin. |
Presentation Profile | Visible if Presentation Video Source is selected. A Presentation Profile is used to define a device profile for your event and specifies attributes such as video sources. You must select a device to stream your video for each live event. See: Select a Presentation Profile for a Webcast Event If you need to define a new profile, see: Add a Presentation Profile in Admin Functions. | |
Video Address | Visible if Video Address Video Source is selected. VC Webcast streaming will need to be enabled by VBrick Support first and you will need a SIP address to stream a video conference for an event. | |
Automated Webcast | Enable if you want your event to begins broadcasting at the appointed start time on its own, automatically, without the need for the Event Admin to start it. See: Schedule an Automated Webcast Event for details. | |
Closed Captions | Select to enable or disable closed captions on your event. | |
Event Admin | Yes | The person that controls event setup. Only the Event Admin may start and control the event. There may only be one Event Admin per event. This field is defaulted to the admin creating the event. The admin may be modified by any Event Admin or Account Admin before the event begins broadcasting. |
Listing Type | The Listing Type determines who is able to view and attend the Webcast. Selections include: ●All Users: All user accounts that have logged in may attend and the event will appear in the Event Calendar and Upcoming Events carousel. ●Private: A private event will only be accessible and visible to those accounts invited to the event. See: Schedule a Private Webcast Event ●Public: A public event may be set up so that anyone can attend the event and not be required to log in to Rev. See: Schedule a Public Webcast Event |
Field | Required | Description |
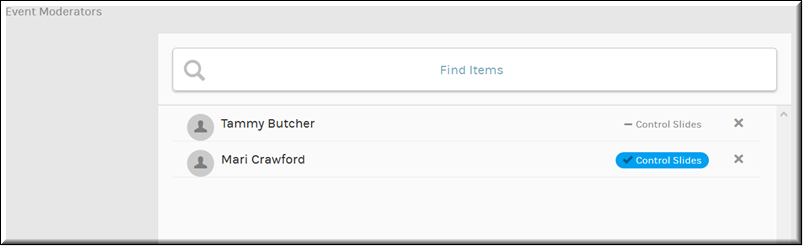
Event Moderators | Use the Find Items search to add one or more Event Moderators to your Webcast. Multiple moderators may be set up so that several event features may be handled at once for large events. Click Done to add the moderator. Once the moderator has been added by clicking Done, you may then designate a moderator to control the presentation slides (instead of the Event Admin) by clicking the Control Slides button. Only one moderator at a time may control the slides. The Control Slides button will only be visible after the moderator has been added by clicking the Done button. Event features include managing polls, live chat, Q&A, and viewing the event details and attendee list. |

Field | Required | Description |
Enable Polls | Select to allow event admins and moderators to insert a poll into the Webcast. A question and four responses may be inserted. See: Add a Poll to a Webcast Event |

Field | Required | Description |
Enable Chat | Enables the Chat interface for attendees during the Webcast. See: Enable Chat for a Webcast Event |
Field | Required | Description |
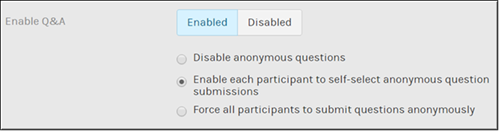
Enable Q&A | Enables the Q&A interface and allows attendees to submit questions for the speaker(s) during the Webcast. Moderators will be able to view and filter the questions submitted. | |
Disable Anonymous Questions | Select to disable anonymous questions from attendees when submitting questions to the Q&A interface during the Webcast. Only appears if the Enable Q&A checkbox is selected. See: Enable or Disable Anonymous Questions for a Webcast Event | |
Enable each participant to self-select anonymous question submissions | Allows attendees to decide if their question is anonymous when submitting questions to the Q&A interface during the Webcast. Only appears if the Enable Q&A checkbox is selected. | |
Force all participants to submit questions anonymously | Forces all questions to anonymous when submitting questions to the Q&A interface during the Webcast. Only appears if the Enable Q&A checkbox is selected. |

Field | Required | Description |
Upload Presentation File | If a PowerPoint presentation will be part of this event, upload it using the Browse button. You may also choose to allow your attendees to download it. See: Upload a PowerPoint Presentation to a Webcast Event for details on sizing and format extensions. |
Field | Required | Description |
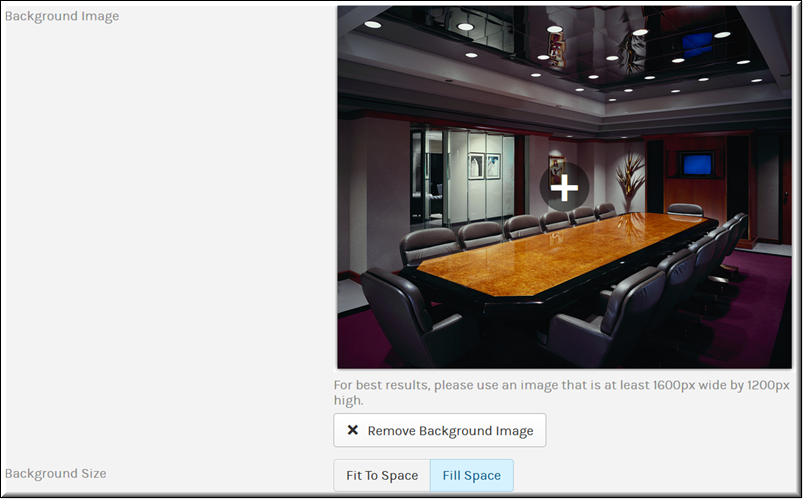
Background Image | Click the (+) link to upload a background image to your Webcast. For best results, use an image that is at least 1600px wide by 1200px high. Click the Remove Background Image button to remove a previously uploaded image. See: Upload a Background Image to a Webcast Event for more details. |
Note: Only Event Admins or Account Admins may be designated as an Event Admin for an event and will appear in the Event Admin dropdown. Any Rev user account may be designated as an Event Moderator. If an Event Admin or Event Moderator must cancel for any reason, any Event Admin or Account Admin in the system has the ability to edit the event for replacements. However, an event may not be edited once it has started broadcasting. |
Role(s): ●Event Admin, Account Admin - Schedules, edits, and controls Webcasts ●Event Moderator - Manages Webcast features for the Event Admin |